Pacific Waves Mitts & Summer Trips_2020
Hi my dear friends and followers!
I am back:) I thought i'll be able to write more often... but life happens and I am lucky that I have time to write once a month!
At the end (or maybe in the middle?:)) of this post - i'll share a free pattern for these cuties - baby-toddler size - step by step instructions for the flat knit method, along with the charts - who is in with me to make these? Makes adorable gift for a new baby for sure!


But first, let me share just a bit about our summer adventures!
SUMMER ADVENTURES:
It was a busy busy summer, not knitting wise - but more kids-house-work-outdoors-stay-healthy-sane wise.
Things we'd done to entertain our little ones (and stay sane, anyone can relate?).
It was fun to try camping (Delaware) and kayaking & fishing with girls -I highly recommend this place - of course, everyone were social distancing and wearing masks in public areas - it was a bit too hot though, but we will be back to this place when it's cooler!


I did like the idea of no phones & computers there too, a LOT... I think we all needed a little bit more of "less electronics" in our lives - to finally see the clear picture of real life.
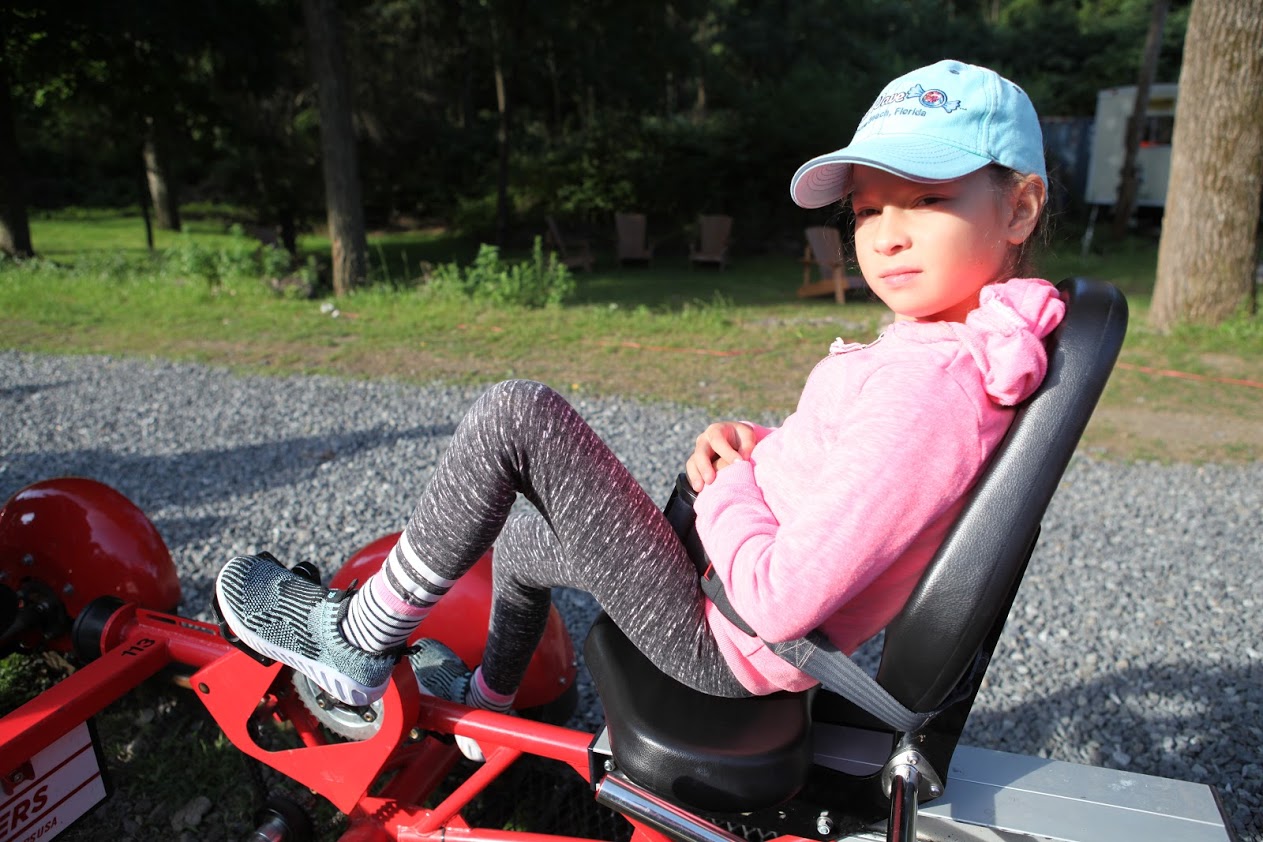
We also did this take this amazing "rail adventure" ride in Castkills - workout + family time + fresh air - what could be better? and Kids were buckled up so we didn't have to chase after them for 2.5 hours - precious time:) LOL


BACK TO KNITTING NOW!
On a knitting note, I really would like to share with you all - these tiny mitts I've made using softest and kind of magical yarn by PANDIA'S JEWELS (I am so much in love with her colorways! But don't be fooled - color is not the only thing you'll fall in love with it... the quality is high, the attention to each detail is impeccable, the shipping and response is always prompt, and the choices!!
The only issue I have with it - I don't ever want to part with any of the knitting items I make with these yarns - I want to keep these all of myself and my kids!
SEE BELOW - STEP BY STEP INSTRUCTIONS (and i'll post a video link on how to make these as well shortly!)
Baby/Toddler size here only - with written & Chart instructions - using FLAT knitting method (I personally think that it's so much easier to make these little mitts using flat method - v circular method - it does require a bit of mattress seaming, but it's really not much of sewing, so i don't mind)I
IF you'd like make matching mommy/daughter or matching younger/older siblings mitts, the full pattern is available here -PACIFIC WAVES MITTS
***** MYLASKNITCORNER.SHOP ***** (i am still working on this building this site - i hope you can forgive me for the "incomplete" look!)
And as always, you get all sizes - baby to adult L, for both flat & circular methods, that come with both written & charted instructions. I have quite few my dears testers who made these - I am posting link to their product pages here - I truly appreciate their input and help with testing these beauties!! What would I do without my testers? I would be lost for sure!
Before we start the pattern - I wanted to share with you all - this amazing dyer has few kits available that will feature my DELIGHT MITTS - pattern comes with yarn:)


I am adding a freebie (the Grey Pearl mitts pattern - pictured on right mitt below) for anyone who buys the kit - just send me an EMAIL and you'll get 2 patterns w the purchase of this kit - mylasknitcorner@gmail.com

I was actually able to make 2 sets of mitts out of 1 skein (picturing SPRING WARRIOR mitts in small adult and small child sizes)... ok ok i am going to stop now - and we'll get to knitting NOW!

PACIFIC WAVES MITTS / baby/toddler size
Skill Level: 3 out of 5 / advanced & adventurous beginner to intermediate.
baby /
TODDLER SIZE: 3.75-4” / 9.5-10.16 cm (circumference) x 5”/ 12.7 cm (length)
TO FIT a baby/toddler hand with
negative ease of 0.5”/1.27 cm
NOTE - when measuring a
baby/child hand, do make sure you measure around the palm right above the
thumb.
MATERIALS
· DK, light
worsted /No 3, Light in US / 8 ply; I’ve used this lovely yarn by Pandia’s Jewels – in Gray Pearl
colorway for this sample;
· Yarn
yardage: 50-60 yards/ 45-54 meters;
· CIRCULAR
knit method: Set of DP Needles or Circular Needle Size 4/US (3.5 mm);
· FLAT knit
method: straight (or double pointed or circular) needles Size 4/US (3.5 mm) or
size needed to obtain below gauge;
· Small
cable needle;
· Scissors,
stitch markers as necessary, tapestry needle, scrap yarn.
GAUGE: In stockinette:
·
20 stitches x
32-34 rows / rounds = 4x4 inches (10x10 cm) Make sure you test/check your gauge
KNITTING METHODS: Pattern is written for both, flat & circular
knitting methods -for these instructions - I’ve used the Flat method for these mitts /
size -but you could find the full flat
& circular versions here -along with the all the sizes (baby to Adult Large
) –
LINK HERE
TYPE OF INSTRUCTIONS: both written and charted instructions provided.
Suggested
CAST ON: Long Tail Cast on with two needles - for the flat
knit method, or magic loop method for circular knit method
Stitches / techniques used &
abbreviations:
BO: bind off
CO: cast on
CN: cable needle
k: knit
k2tog: knit 2 together
k2togTBL: knit 2 together through back loops
p: purl
p2tog: purl 2 together
p2togTBL: purl 2 together through back loops
PM: place marker
R: Row/Round
RS: right side
St(s): stitch(es)
Sl1: slip 1 stitch
without knitting or purling (knitwise)
SM:
slip marker
TURN: turn your work (where
indicated) and work the stitches from the other side/WS
WS: wrong side
|
RLI – Right Lifted Increase easy to memorize as the
Increase that is Leaning to the Right Knit into the Back of stitch (in the “purl bump” in the row/round directly below the stitch on the left needle. Same is for RLI(p) - but you'll have to "create" a new Purl st. |
LLI – LEFT Lifted Increase easy to memorize as the
Increase that is Leaning to the Left Same is for LLI(p) - but you'll have to "create" a new Purl st. |
OTHER HELPFUL LINKS – see my youtube videos for most of the stitches

LEFT mitt (note: R & L mitts are not the same)
CO 26 sts, using long tail CO method.
Rs 1 - 4: Sl1, k24, p1.
(26 sts)
R5: Sl1, k9, p14, k1, p1.
R6: Sl1, p1, k2, p2, LLI(p),
p1, RLI(p), p1, k8, p10. (28 sts)
R7: Sl1, k9, p8,
3/3 LC, p2, k1, p1.
R8: Sl1, p1, k2, p6, k8,
p10.
R9: Sl1, k9, p6,
3/2 RPC, 3/1 LPC, p1, k1, p1.
R10: Sl1, p1, k1, p3, k3,
p3, k6, p10.
R11: Sl1, k9, p4,
3/2 RPC, p3, k3, p1, k1, p1.
R12: Sl1, p1, k1, p3, k5,
p3, k4, p10.
R13: Sl1, k9, p2,
3/2 RPC, p4, 3/1 RPC, p1, k1, p1.
R14: Sl1, p1, k2, p3, k6,
p3, k2, p10.
R15: Sl1, k9, p1,
3/1 RPC, p4, 3/2 RPC, p2, k1, p1.
R16: Sl1, p1, k4, p3, k5,
p3, k1, p10.
R17: Sl1, k9, p1, k3, p3,
3/2 RPC, p4, k1, p1.
R18: Sl1, p1, k6, p3, k3,
p3, k1, p10.
R19: Sl1, k8, RLI, k1,
p1, 3/1 LPC, 3/2 RPC, p6, k1, p1. (29 sts)
R20: Sl1, p1, k8, p6, k2,
p11.
R21: Sl1, k10, p2,
3/3 LC, p8, k1, p1.
R22: Repeat R20.
R23: Sl1, k8, LLI, k1, RLI,
k1, p1, 3/1 RPC, 3/2 LPC, p6, k1, p1. (31 sts)
R24: Sl1, p1, k6, p3, k3,
p3, k1, p13.
R25: Sl1, k8, RLI, k3, LLI,
k1, p1, k3, p3, 3/2 LPC, p4, k1, p1. (33 sts)
R26: Sl1, p1, k4, p3, k5,
p3, k1, p15.
R27: Sl1, k8, RLI, k5, LLI,
k1, p1, 3/1 LPC, p4, 3/2 LPC, p2, k1, p1. (35 sts)
R28: Sl1, p1, k2, p3, k6,
p3, k2, p18. (36 sts)
R29: Sl1, k8, RLI, k7, LLI,
k1, p2, 3/2 LPC, p4, 3/1 LPC, p1, k1, p1. (37 sts)
R30: Sl1, p1, k1, p3, k5,
p3, k4, p19.
To work
thumb sts flat
R31: Sl1, k8, k9, TURN
(don’t cut the main
yarn);
Next Row, you’ll
be working Thumb (9 sts) only:
R1:
(WS): sl1, p8; TURN;
R2
(RS): sl1, k7, p1; TURN;
R3-4:
sl1, k7, p1, TURN;
BO 9 sts in knit loosely; cut the yarn,
leaving approx. 4 inch tail;
Attach new yarn
(from WS) and continue with row 31
R31: k1below (SEE VIDEO),
p4, 3/2 LPC, p3, k3, p1, k1, p1. (28 sts)
R32: Sl1, p1, k1, p3, k3,
p3, k6, p1, p1below (SEE VIDEO), p8.
R33: Sl1, k7,
1/1 LC, p6, 3/2 LPC, 3/1 RPC, p1, k1, p1.
R34: Repeat R8.
R35: Repeat R7.
R36: Repeat R8.
R37: Sl1, k9, p8, ssk,
k2, k2tog, p2, k1, p1. (26 sts)
R38: Sl1, p1, k2, p4, k8,
p10.
R39: Sl1, k9, p8, ssk,
k2tog, p2, k1, p1. (24 sts)
R40: Sl1, k3, p2tog, k17,
p1. (23 sts)
Rs 41 - 44: Sl1, k21,
p1.
BO all sts in KNIT.
R5: Sl1, k1, p14, k9, p1.
R6: Sl1, p9, k8, p1, LLI(p),
p1, RLI(p), p2, k2, p2. (28 sts)
R7: Sl1, k1, p2,
3/3 RC, p8, k9, p1.
R8: Sl1, p9, k8, p6, k2,
p2.
R9: Sl1, k1, p1,
3/1 RPC, 3/2 LPC, p6, k9, p1.
R10: Sl1, p9, k6, p3, k3,
p3, k1, p2.
R11: Sl1, k1, p1, k3, p3,
3/2 LPC, p4, k9, p1.
R12: Sl1, p9, k4, p3, k5,
p3, k1, p2.
R13: Sl1, k1, p1,
3/1 LPC, p4, 3/2 LPC, p2, k9, p1.
R14: Sl1, p9, k2, p3, k6,
p3, k2, p2.
R15: Sl1, k1, p2,
3/2 LPC, p4, 3/1 LPC, p1, k9, p1.
R16: Sl1, p9, k1, p3, k5,
p3, k4, p2.
R17: Sl1, k1, p4,
3/2 LPC, p3, k3, p1, k9, p1.
R18: Sl1, p9, k1, p3, k3,
p3, k6, p2.
R19: Sl1, k1, p6,
3/2 LPC, 3/1 RPC, p1, k1, LLI, k8, p1. (29 sts)
R20: Sl1, p10, k2, p6,
k8, p2.
R21: Sl1, k1, p8,
3/3 RC, p2, k10, p1.
R22: Repeat R20.
R23: Sl1, k1, p6,
3/2 RPC, 3/1 LPC, p1, k1, LLI, k1, RLI, k8, p1. (31 sts)
R24: Sl1, p12, k1, p3,
k3, p3, k6, p2.
R25: Sl1, k1, p4,
3/2 RPC, p3, k3, p1, k1, RLI, k3, LLI, k8, p1. (33 sts)
R26: Sl1, p14, k1, p3,
k5, p3, k4, p2.
R27: Sl1, k1, p2,
3/2 RPC, p4, 3/1 RPC, p1, k1, RLI, k5, LLI, k8, p1. (35 sts)
R28: Sl1, p17, k2, p3,
k6, p3, k2, p2. (36 sts)
R29: Sl1, k1, p1,
3/1 RPC, p4, 3/2 RPC, p2, k1, RLI, k7, LLI, k8, p1. (37 sts)
R30: Sl1, p18, k4, p3,
k5, p3, k1, p2.
To work
thumb STS flat
R31: Sl1, k1, p1, k3, p3, 3/2 RPC,
p4, k10,
TURN (don’t cut the main yarn);
Next Row, you’ll
be working Thumb (9 sts) only:
R1:
(WS): sl1, p8; TURN;
R2
(RS): sl1, k7, p1; TURN;
R3-4:
sl1, k7, p1, TURN;
BO 9 sts in knit loosely; cut the yarn,
leaving approx. 4 inch tail;
Attach new yarn
(from WS) and continue with row 31
R31: k1below (SEE VIDEO LINK HERE), k7, p1. (28 sts)
R32: Sl1, p8, p1below (SEE
VIDEO LINK HERE), k6, p3, k3, p3, k1, p2.
R33: Sl1, k1, p1,
3/1 LPC, 3/2 RPC, p6, 1/1 RC, k7, p1.
R34: Repeat R8.
R35: Repeat R7.
R36: Repeat R8.
R37: Sl1, k1, p2, ssk,
k2, k2tog, p8, k9, p1. (26 sts)
R38: Sl1, p9, k8, p4, k2,
p2.
R39: Sl1, k1, p2, ssk,
k2tog, p8, k9, p1. (24 sts)
R40: Sl1, k17,
p2tog tbl, k3, p1. (23 sts)
RS 41 - 44: Sl1, k21,
p1.
BO all sts in KNIT.
|
BLOCKING
& SEAMING First, gently block your mitten before seaming any parts. Then, seam the thumb part (from the RS) using mattress seam stitch on stockinette stitch, then seam the side of the mitts (from the RS) using same technique. CHARTS:
|


Very cute mitts. Yarn looks amazing.
ReplyDeleteLove the camping photos. You all look like you had so much fun!
Oh - I am happy for the first comment!! hello Stefanie - and thank you!
DeleteThanks for the free pattern! Grandies will each get a pair of these for the holidays this year!
Deleteexcited to see your pictures! and your grandies are super lucky to have you to knit for them! thank you for reading!
DeleteGorgeous Post Myla! And lovely pattern. Thank you too for the link to that beautiful yarn.
ReplyDeleteCheers Karin/ Ginsling/ The Knitting Man Recommends...
you make me blush! thank you so much - so new to this way of sharing! I thought it would be a good idea to keep it all in one place - i hope to add a bit more cooking, baking, reno and gardening posts!
DeleteFirst off, thank you so much for sharing the free pattern. All the mitts look beautiful.
ReplyDeleteYour family trip sounded great. What a wonderful way to make memories with your girls. That rail ride looked to be loads of fun! I'm with you on stepping away from computers, etc. for awhile. My husband and I go camping each fall. We do have our cell phone with us so family can reach us in the event of an emergency (I have elderly parents), but for the most part, we're off the grid. I get lots of knitting done while soaking in the beautiful nature around me.
Thank you for the free pattern.
ReplyDelete